
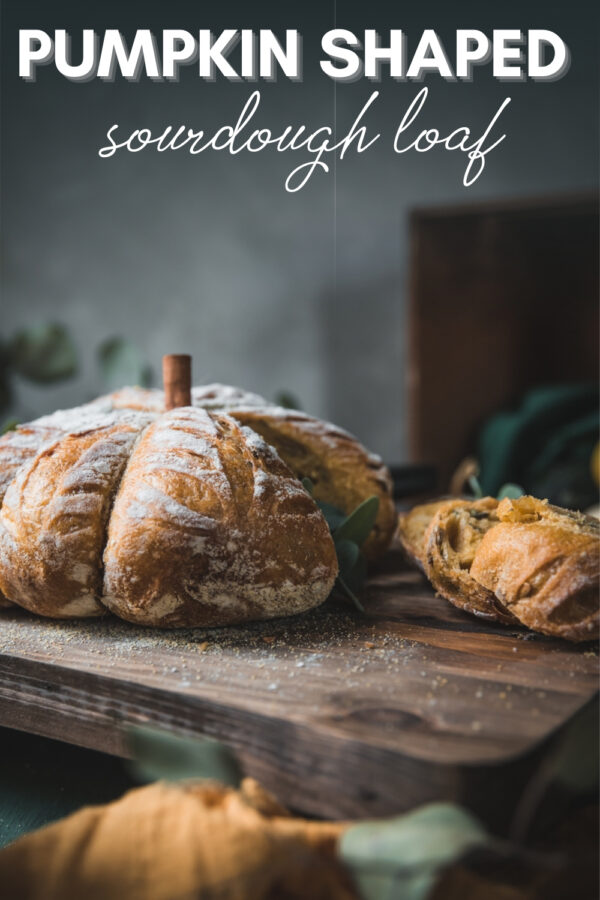
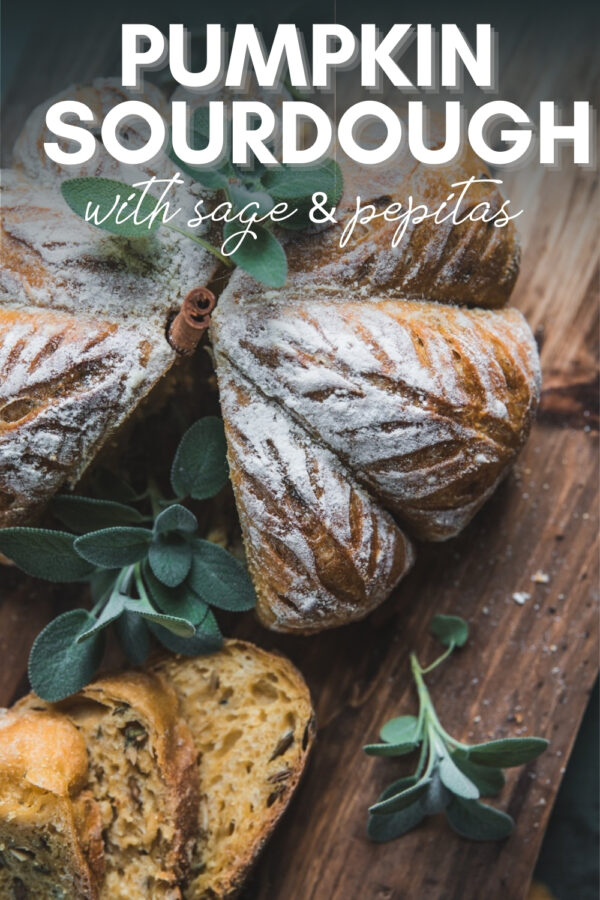

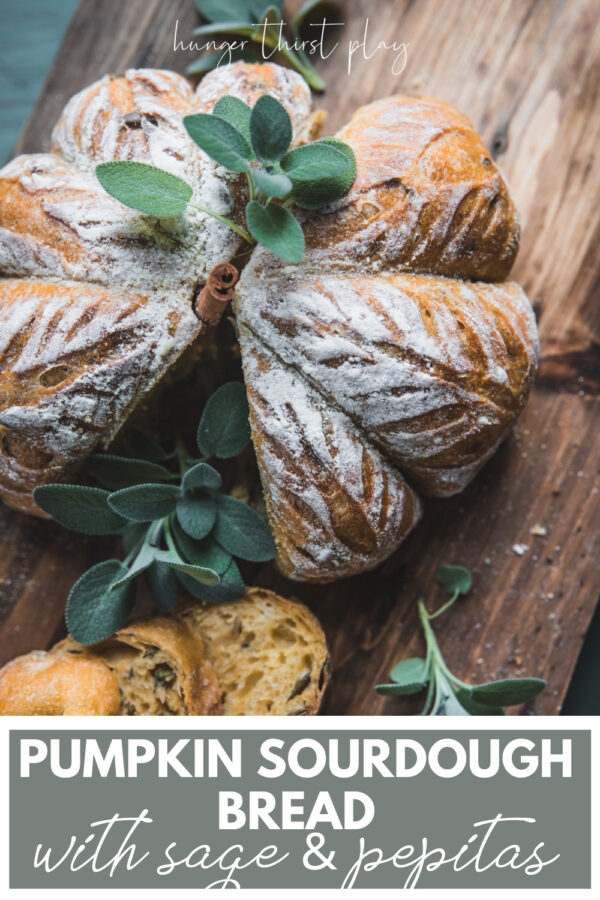
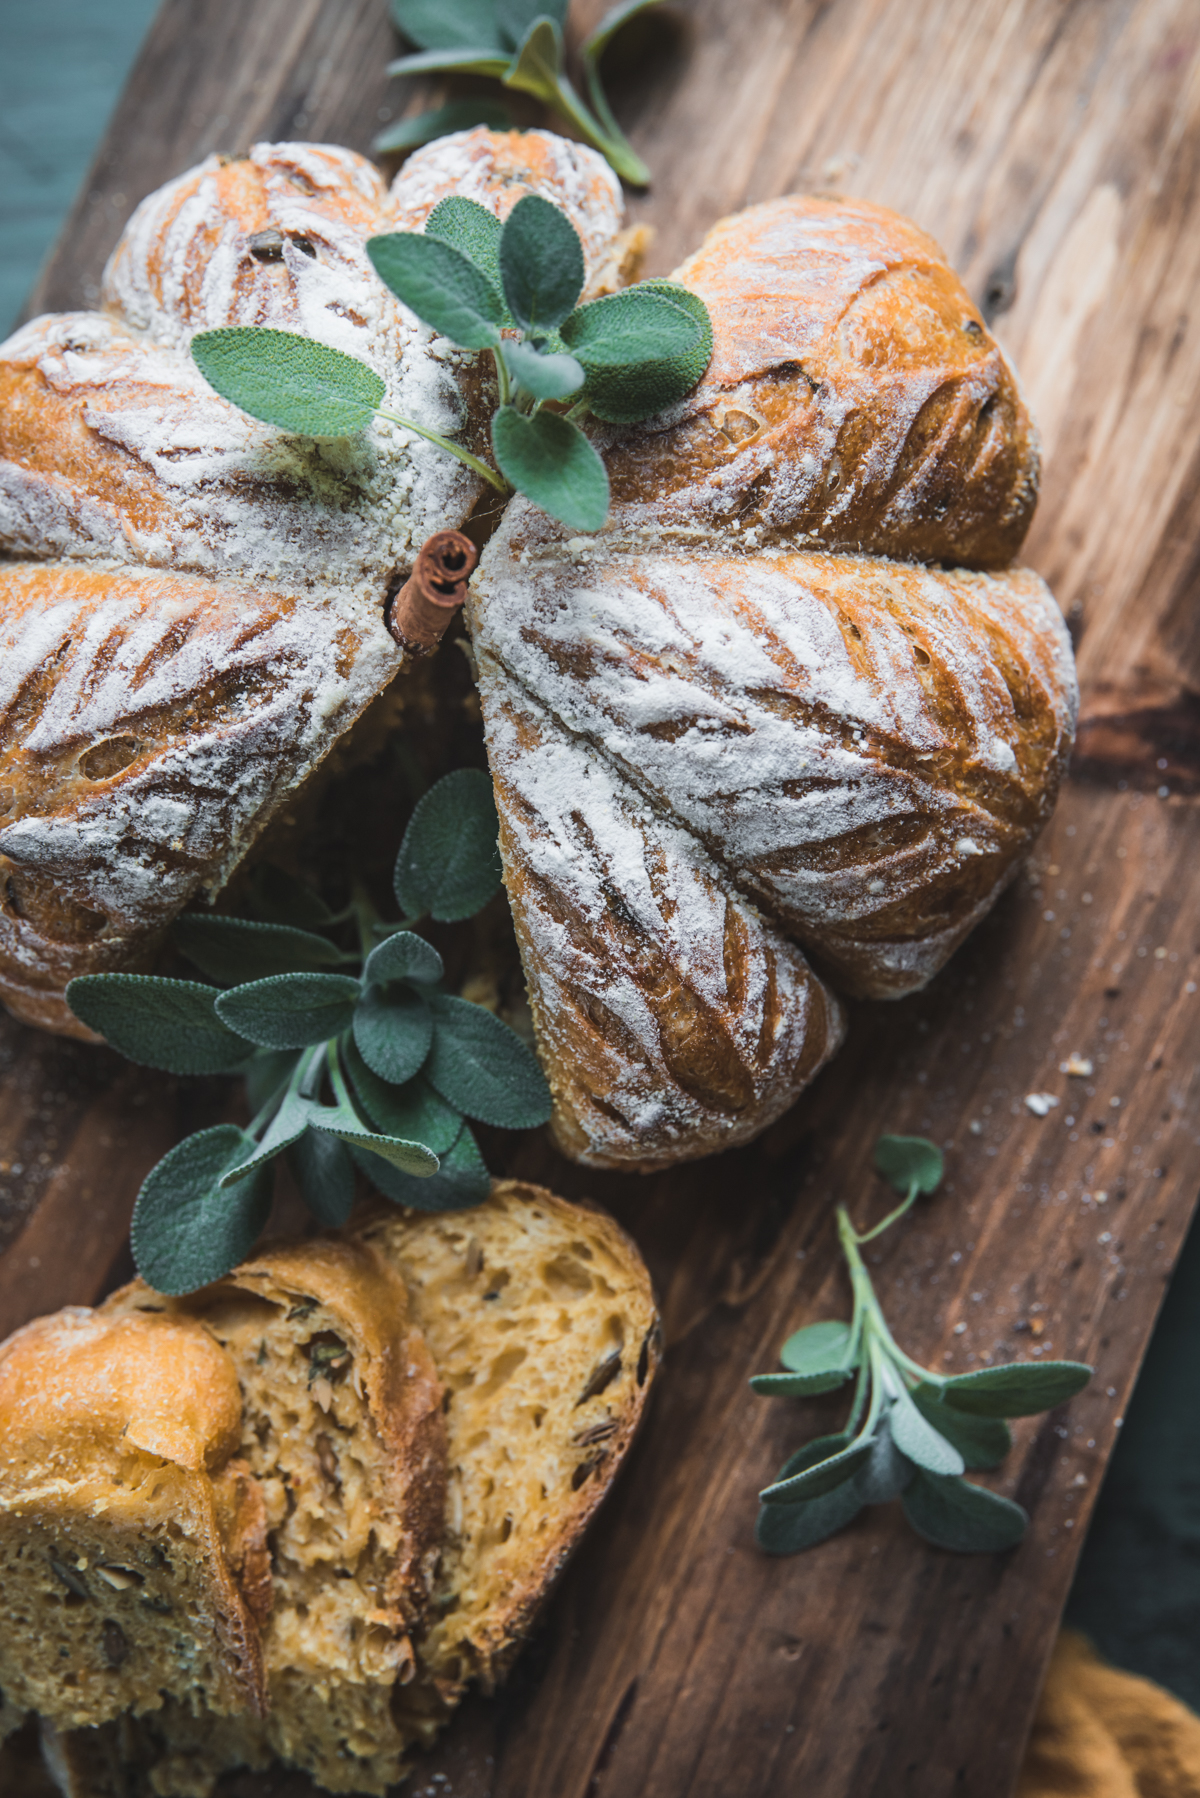
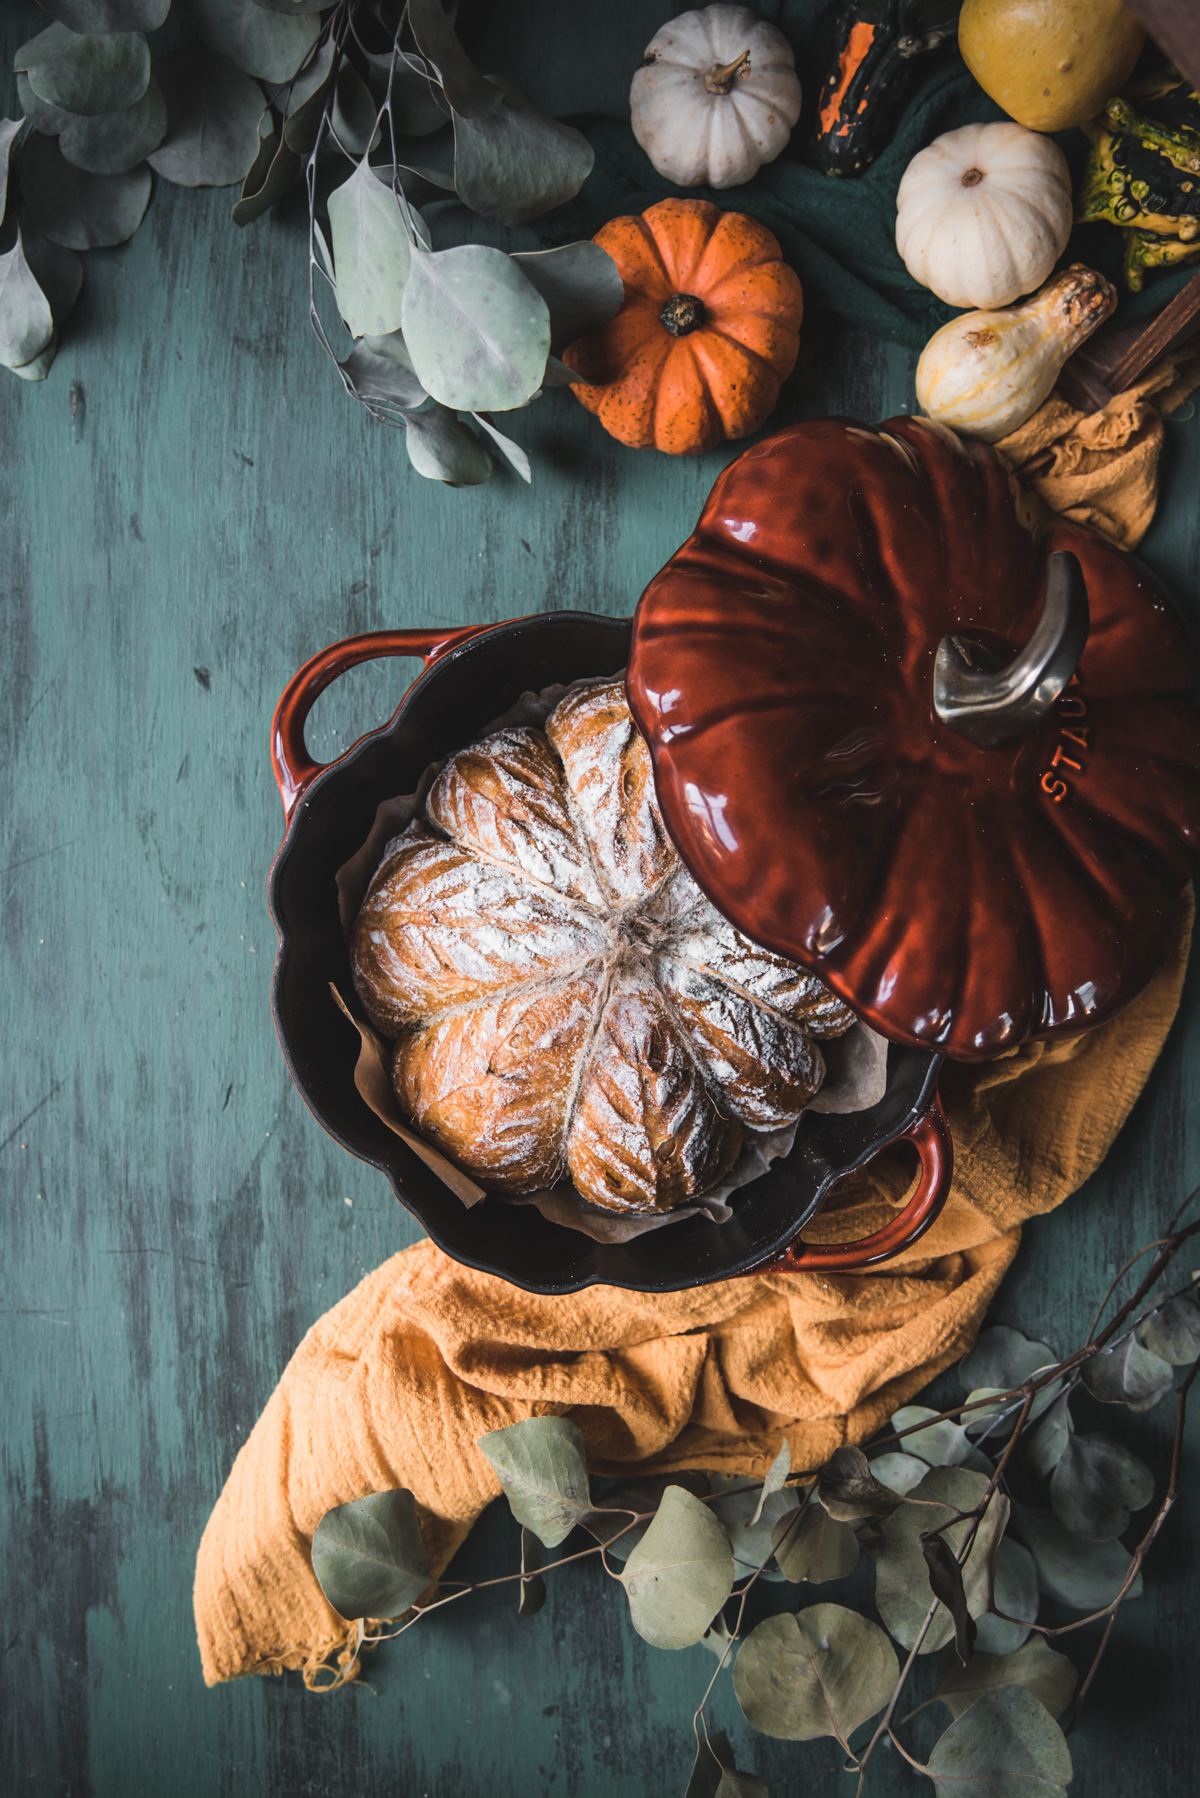
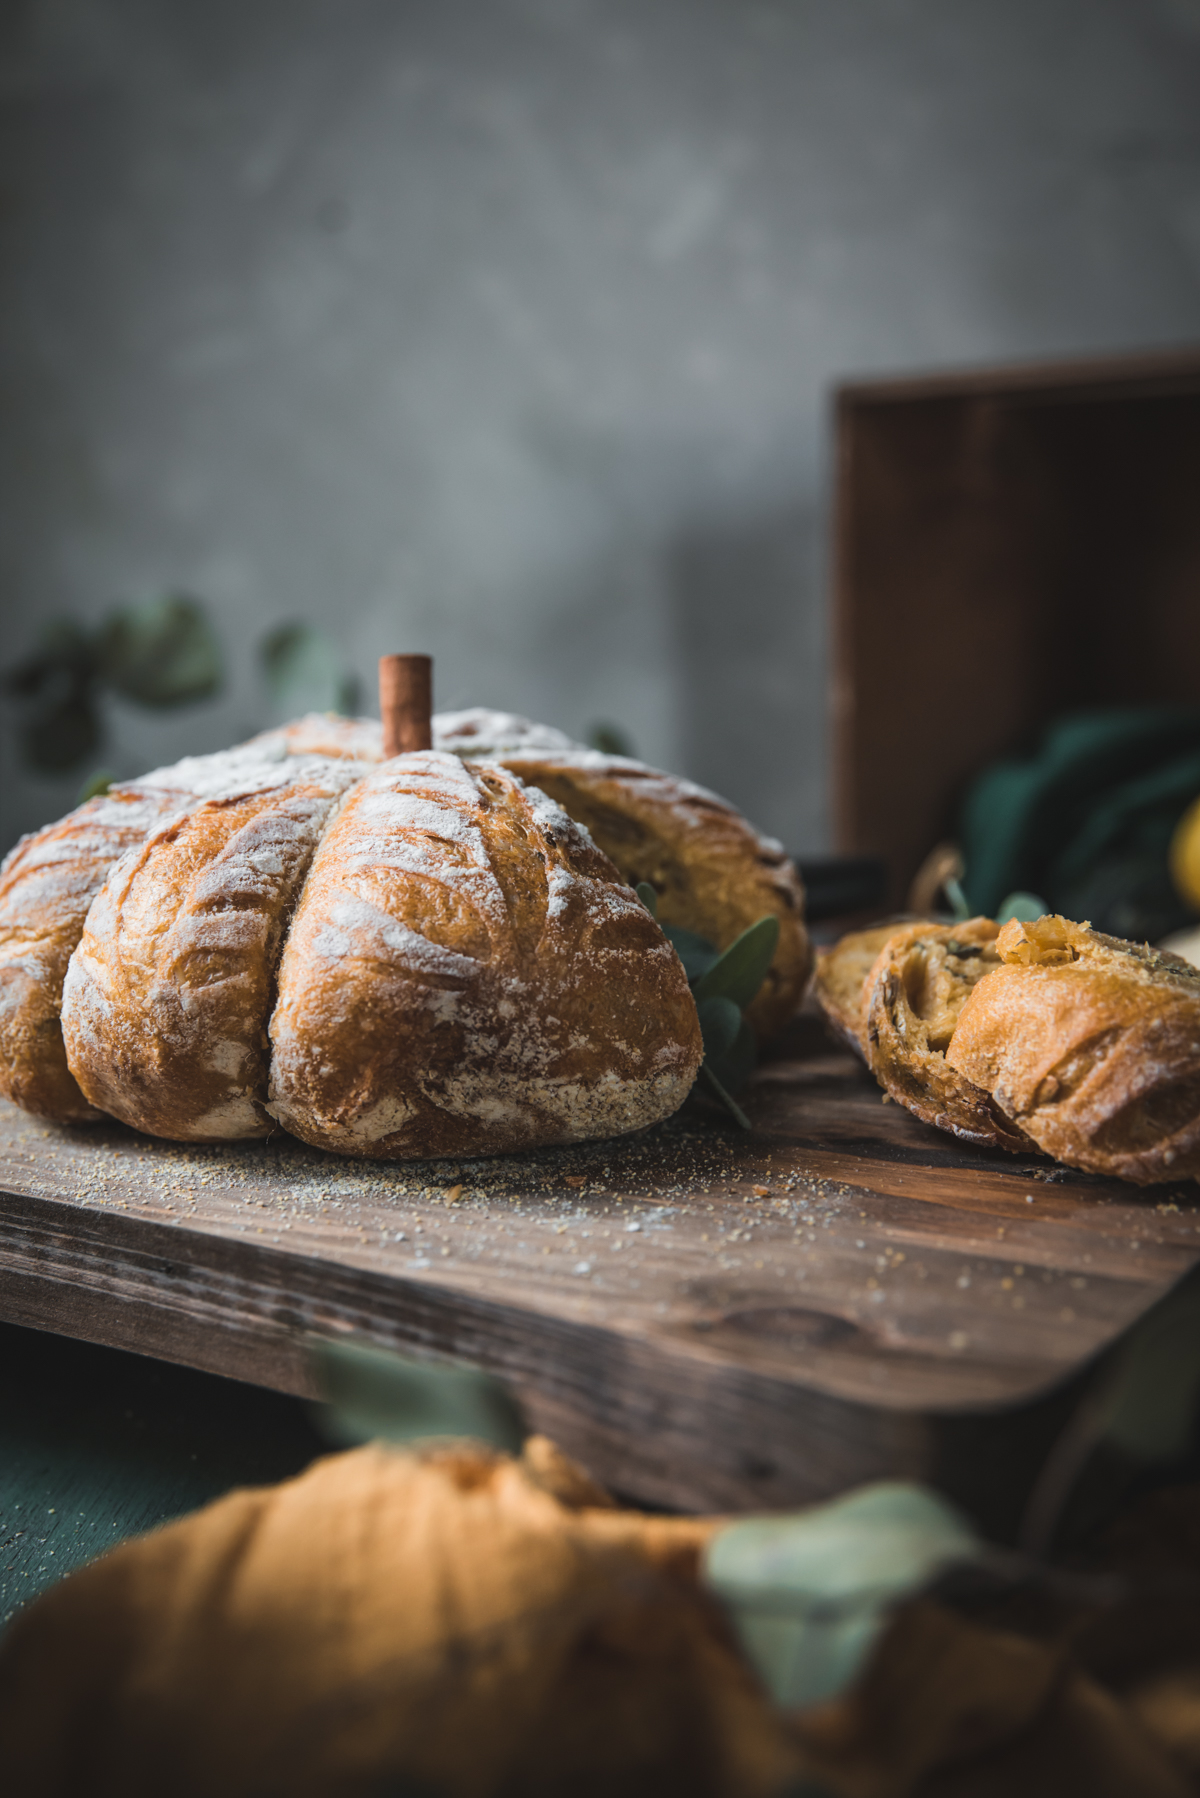
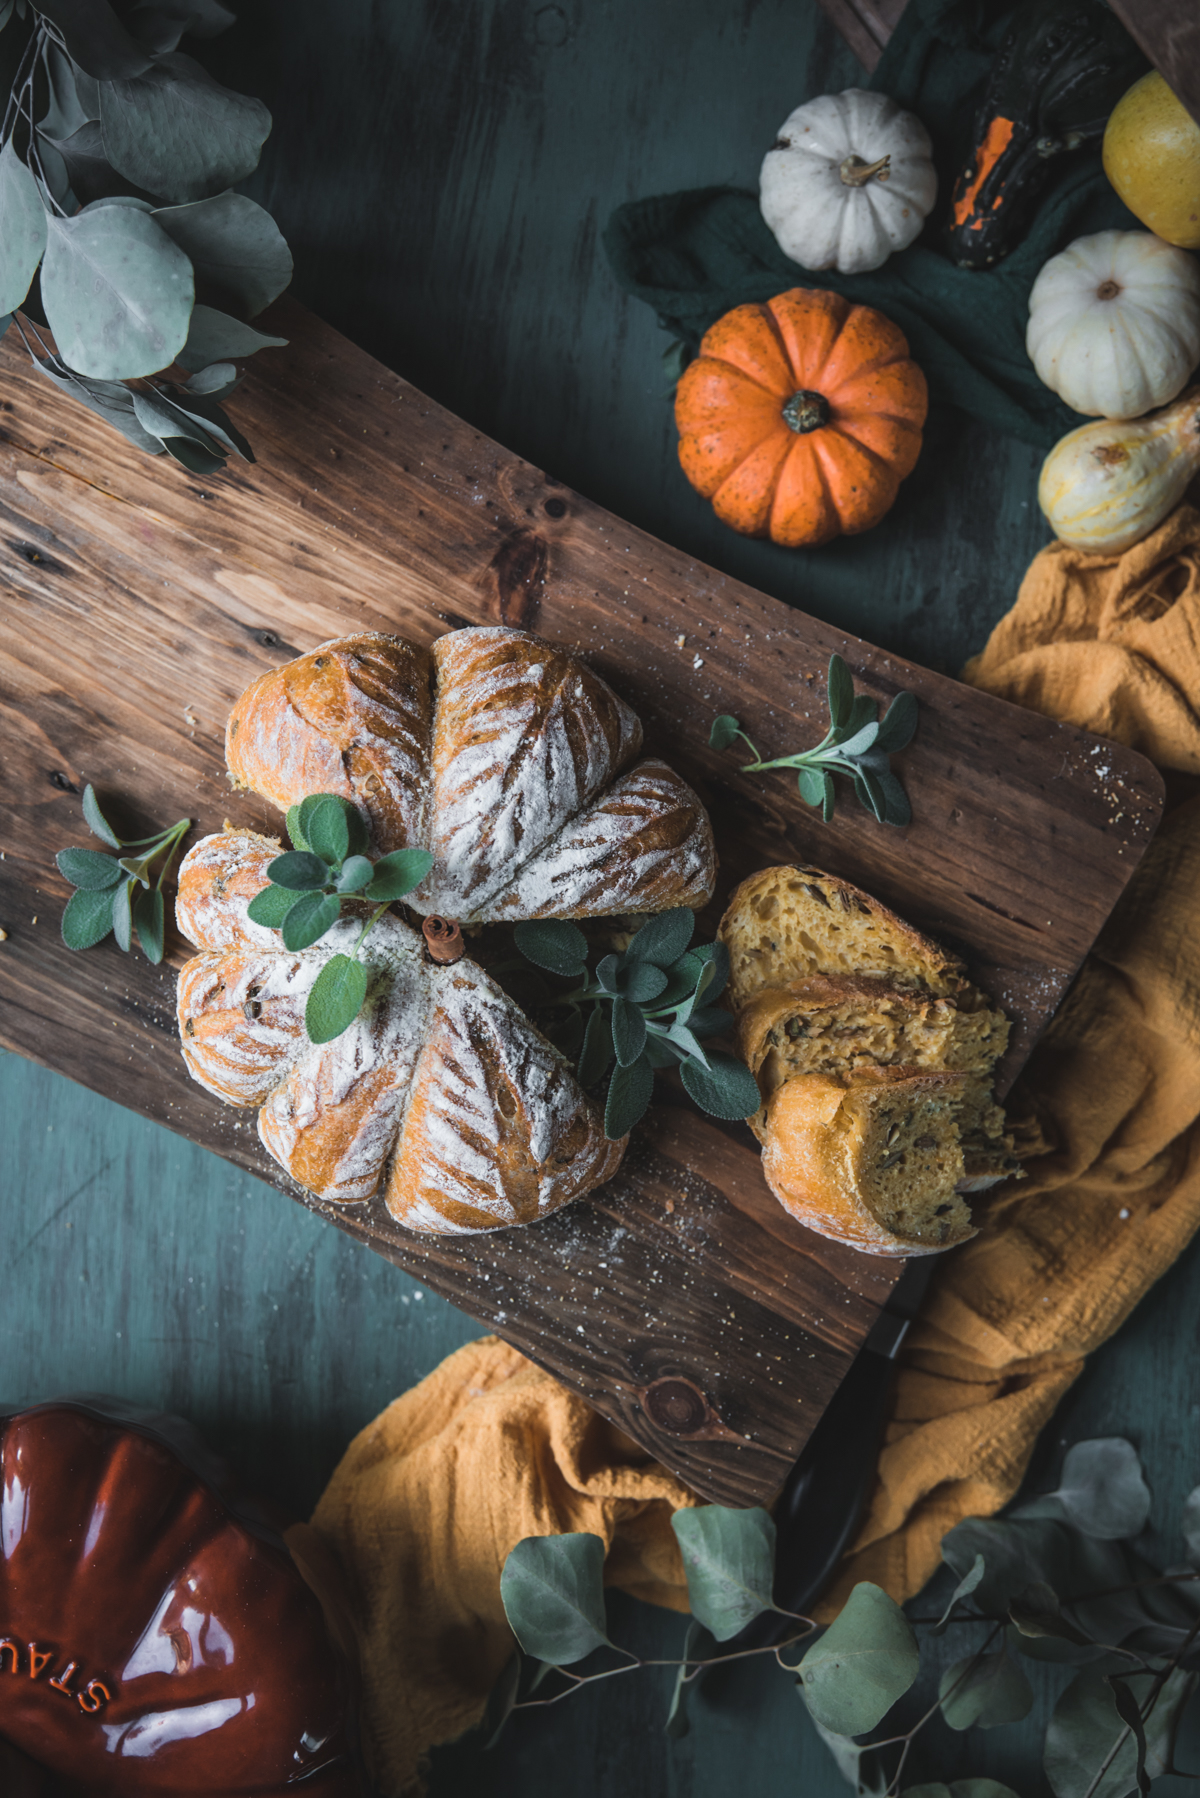
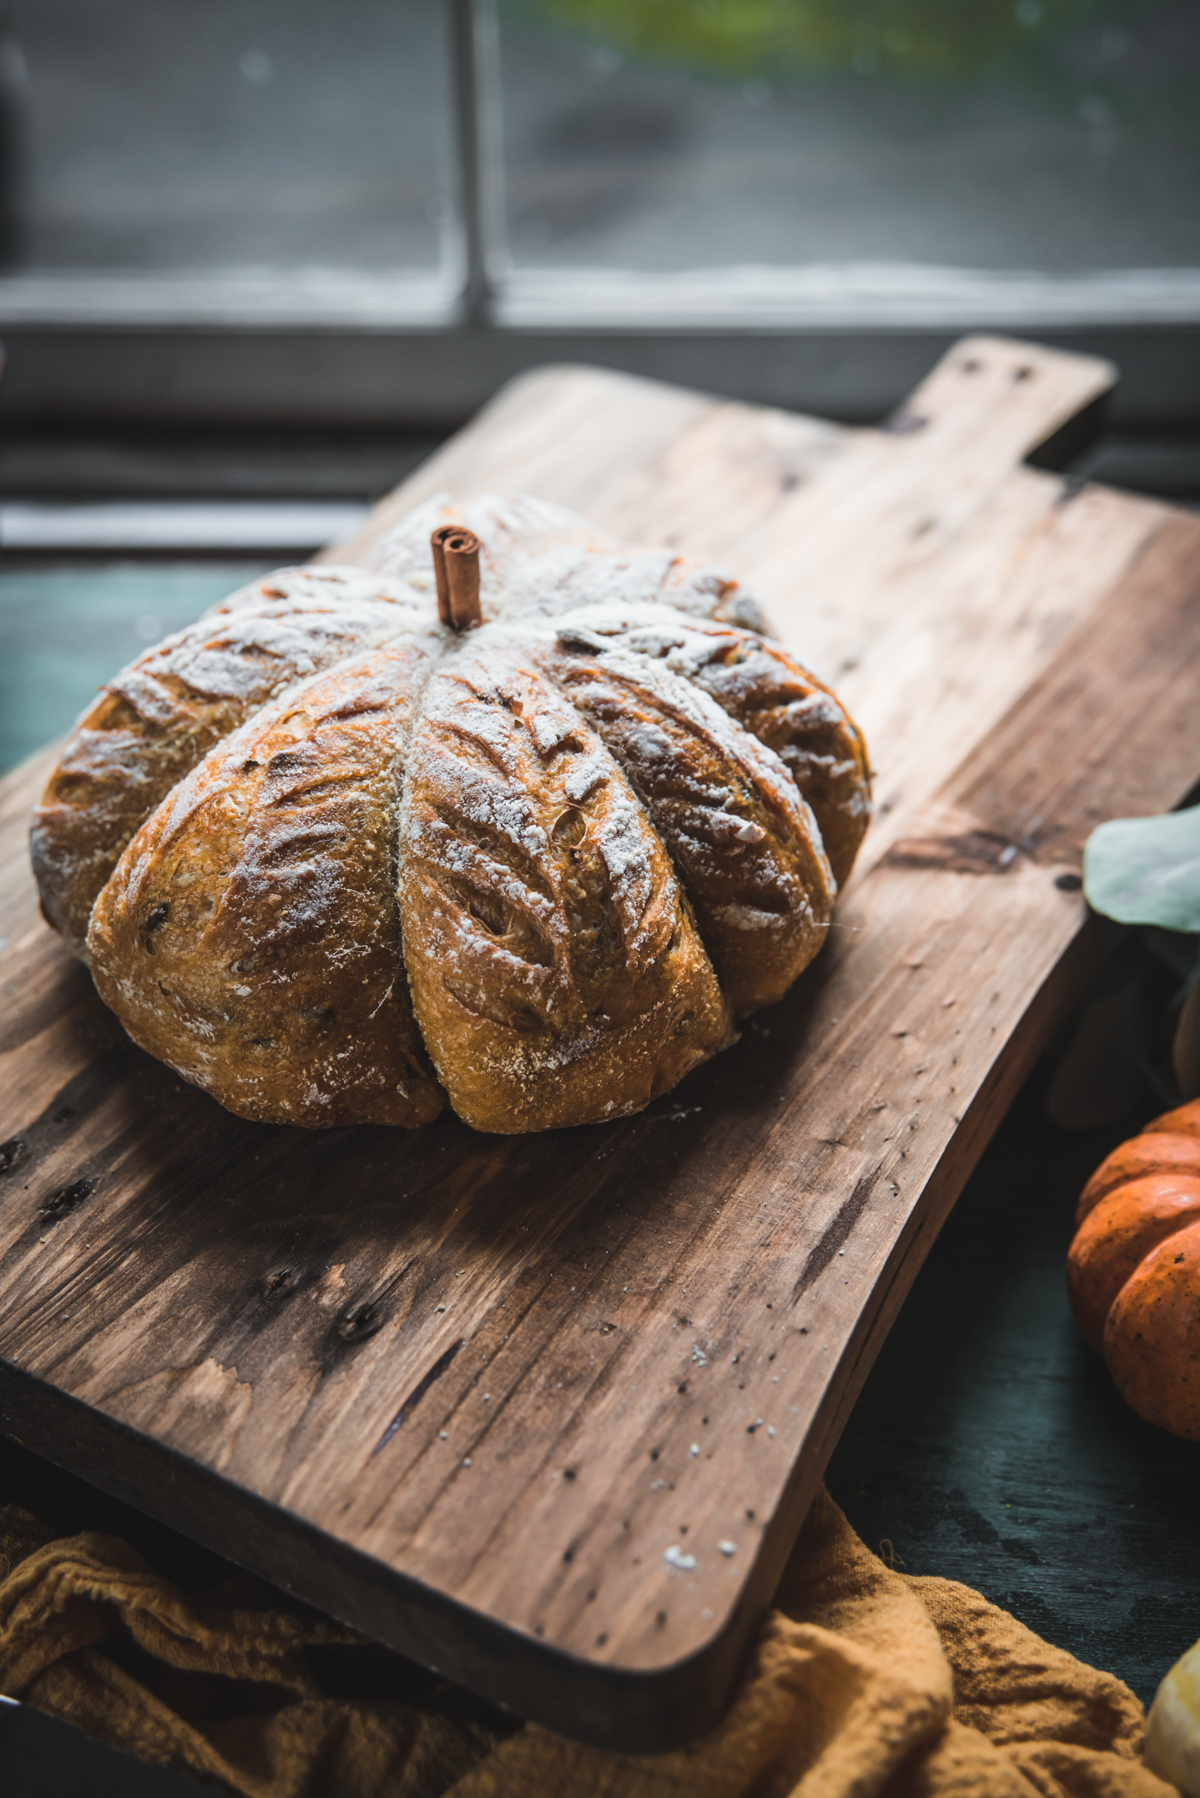
Savory pumpkin sourdough with crunchy pepitas and herbaceous sage laced throughout is the perfect bake for serving alongside all your favorite fall comfort food. This pumpkin sourdough bread has higher hydration for an almost creamy crumb texture and a softer but still crunchy crust.
Shout out to my sourdough bakers! Admittedly, I lost my way over the summer and killed my original quarantine starter, but I got my hands on another one (Thanks King Arthur) and the sourdough baking is on!
If you have a sourdough starter you have got to try this Pumpkin Sourdough Bread with Sage and Pepitas - or find a neighbor willing to give you some!
- higher hydration dough = really soft, chewy, almost melty crumb
- tearable, not quite so hard crust but still crunchy
- increased starter amount for faster proofing
- savory pumpkin flavor
- crunchy pumpkin seeds and pop of sage flavor baked into each slice
- adorable pumpkin shape!!
If anything, be here for the adorable fall-inspired shape because it's super easy and so much fun!
Ingredients for the bread
To bake your self rising fall beauty, you'll need the following:
- fed and bubbly sourdough starter
- all purpose flour
- water
- salt
- pumpkin puree
- pepitas/pumpkin seeds
- fresh sage leaves
How to make a pumpkin shaped bread
Once the dough is ready to bake you can start the process! Best news ever, it's super easy to shape a loaf of bread to look like a pumpkin.
Here are a few of my favorite tips:
- cut the kitchen string long enough to tie at the top
- the tied strings should loosely hug the dough, if you tie too tight they'll bake into the dough (which isn't a huge problem just hard to remove)
- cut off any excess string after tying
- optional: you can wet the string with oil to make them easier to remove but it's not completely necessary
While it's still in the banneton, sprinkle what will be the bottom of your dough with cornmeal or flour. Lay the string across the top of the bowl by making a cross then into sections until you get that start shape.
TIP: you can drizzle or soak the string in oil (canola, avocado, vegetable) so they're easier to remove after baking.
Cover the strings with your parchment paper followed by a plate or cutting board. Gently flip the bowl onto the plate/cutting board and put the banneton aside.
Now you can tie your strings! You may need to navigate where the two ends of each string are first so you don't tie the wrong pieces together.
Tie the string in the center of the loaf with the string just loosely hugging the loaf. The dough will expand as it bakes making the pumpkin shape.
Cut off any excess string from the top. Dust with flour and score your favorite design.
After baking, remove the string and use a cinnamon stick or cashew in the center of the loaf for the stem!
Sample Baking Schedules
Sample Baking Schedule A:
- morning: feed starter
- late afternoon: make dough when the starter is just before it peaks
- evening: bulk rise and shape dough
- overnight: second rise/rest in fridge
- next morning: string, score, and bake
Sample Baking Schedule B:
- morning: feed starter
- late afternoon: make dough when the starter is just before it peaks
- evening: bulk rise and shape dough
- evening: second rise at room temperature
- evening: string, score, and bake
Sample Baking Schedule C:
- evening: feed starter
- early morning: make dough when the starter is just before it peaks
- morning: bulk rise and shape dough
- afternoon: second rise at room temperature
- afternoon: string, score, and bake
More sourdough resources
Sourdough is such a fun baking technique to learn! I really love being able to just whip up a bakery-quality loaf in my own kitchen.
If you're newer to sourdough baking, I'd highly recommend starting with my whole wheat pumpkin loaf - whether you make the pumpkin shape or not. The hydration is a little lower and that makes the loaf easier to shape (in my opinion). There's also a ton more step-by-step photos so you can see the stretch and fold and shaping process!
When I have a loaf that doesn't go as planned or the oven spring just didn't work out, a Panzanella salad is my first choice for repurposing.
If you need something to do with the leftover starter, I add some to my pancake mix, or for an indulgent treat, try these apple fritters with bourbon glaze. So delicious!
If you make this pumpkin sourdough bread, I'd love for you to tag @hungerthirstplay in your social posts! Happy fall everyone!

Pumpkin Sourdough Bread with Sage and Pepitas
Equipment
- kitchen string
- bread lame or sharp knife
- parchment paper
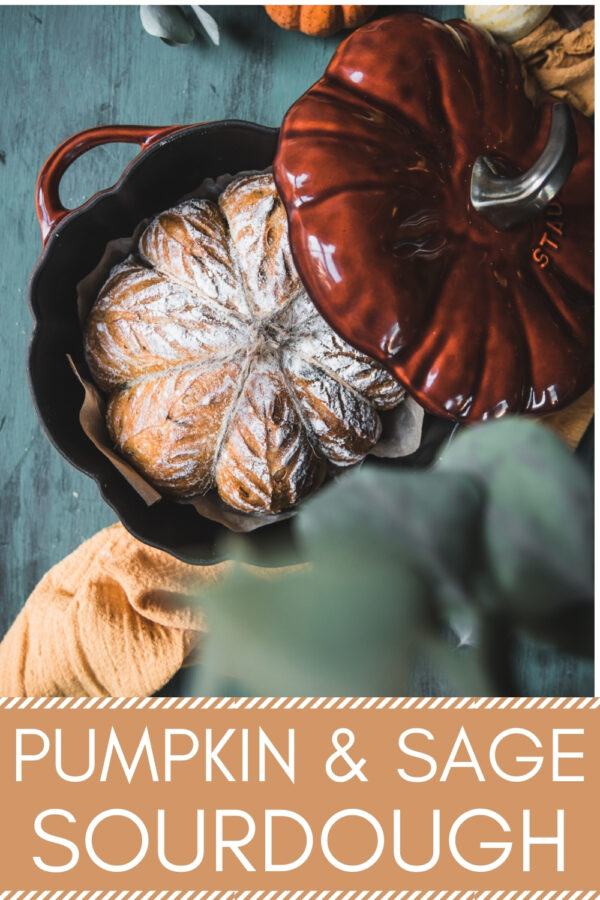
- dutch oven
Ingredients
- 100g sourdough starter, active and bubbly (½ cup)
- 295 grams water (see notes) (1 ¼ cup)
- 7 grams salt (1 teaspoon)
- 130 grams pumpkin purée (½ cup)
- 500 grams all purpose flour (4 cups + 2 tablespoons)
- 35 grams pepitas/pumpkin seeds (¼ cup)
- 8 to 10 sage leaves (chopped)
Instructions
- Make the dough. In a medium bowl, use a fork to whisk together the water, starter, salt, and pumpkin purée until smooth. Add the flour, sage, and pumpkin seeds. Mix together until a rough, shaggy dough forms. Cover with plastic wrap or a damp towel and rest at room temperature for 30 minutes.
- Form the dough. After the 30 minute rest, form the dough into a rough ball shape by stretching the four sides of the dough gently up and over the dough one side at a time. How to do the stretch and folds: using a lightly wet hand, pull one side of the dough away from the edge of the dough and gently stretch it up and over the remaining dough, pushing it slightly into the dough. Repeat with the remaining sides. Cover the bowl with plastic wrap or a damp towel. Let the dough rest for 1 hour covered.
- Stretch and folds. Repeat the stretch and folds, cover and let the dough rest again for 1 hour, then repeat the stretch and folds one last time.
- Bulk rise. After the final stretch and fold series, cover the dough with plastic wrap or a damp towel and let the dough rest another 3 to 4 hours (for a total bulk rise of about 6 hours). Depending on the temperature of your kitchen, this could take more or less time. The dough should look about double in size and have a bit of bounce to it if poked with a finger.
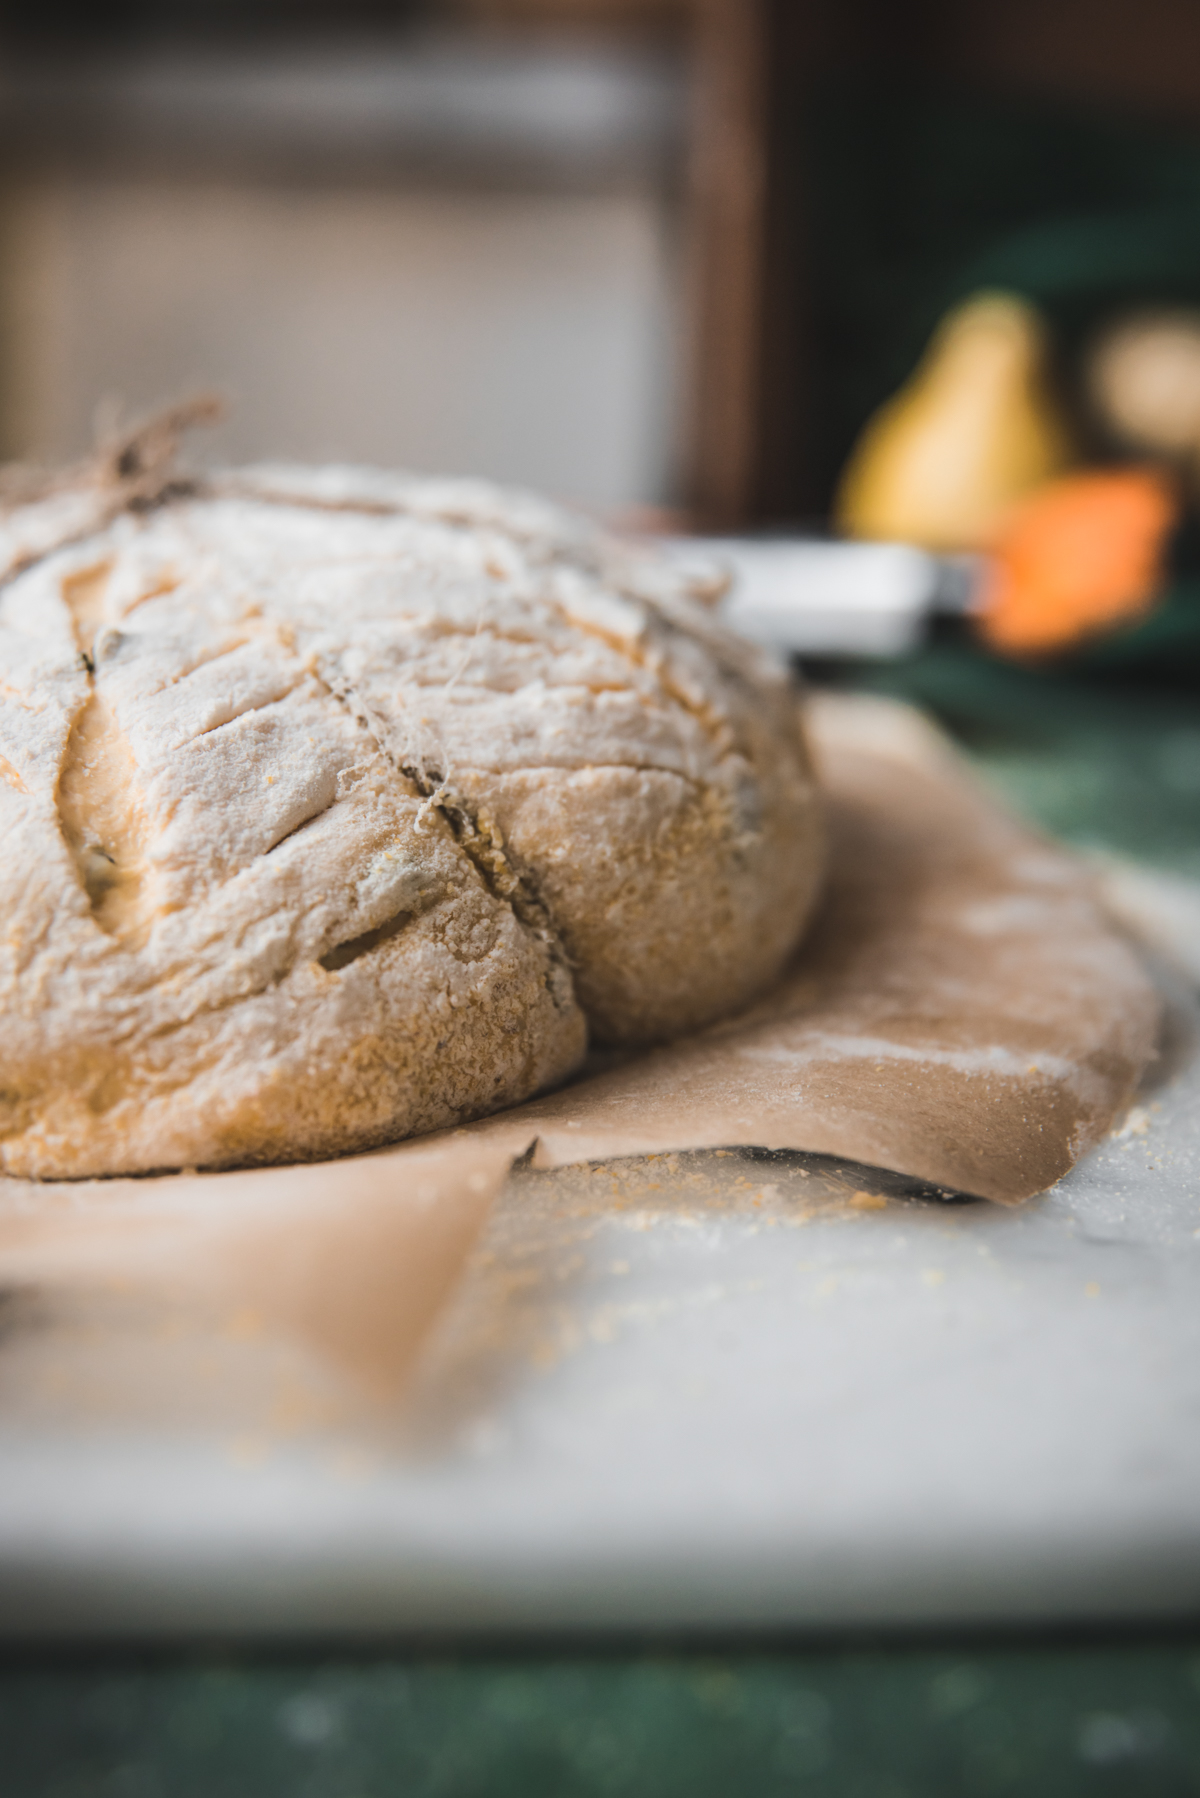
- Shape the dough. Generously flour a medium bowl lined with a cotton or linen cloth or use a proofing basket, set aside. Tip the dough from its bowl onto a very lightly floured surface. Gently stretch and fold the four sides of the dough. Using a bench scraper, flip the dough over, cover with a damp cloth and rest 15 to 20 minutes.
- With the bench scraper, flip the dough over again so the smooth side is facing the work surface. If the dough is sticky, wet your hands. Cup your hands around the far side of the dough and pull it towards you in a circular motion. You may find it easier to use a bench scraper to help you slightly move the dough while you shape it. After shaping the dough, place it seam side up in the proofing basket/cloth-lined bowl.
- Second rise. Let the dough rest for 30 minutes to 1 hour or leave the dough in the fridge overnight. Preheat the oven to 450°F with the dutch oven and lid inside. Cut a piece of parchment paper to fit the inside of your dutch oven with just enough space to lift into the pan. I like to cut a parchment paper circle with narrow, longer pieces of two sides to use as handles.
- Make the pumpkin shape. Optional: Sprinkle the top of the loaf in the breadbasket with cornmeal (this will end up being the bottom once the dough is turned out). Cut 4 long pieces of kitchen string and place over the dough in the breadbasket at 12 o'clock, 3 o'clock, in between 4 and 5 o'cloc, and in between 7 and 8 o'clock. Cover with parchment paper, then a cutting board or plate and gently flip over. After turning the dough out, sprinkle and lightly rub flour over the surface of the dough. Tie the strings at the center of the top of the dough. Cut any excess string.
- Score the dough. Use your own design to score the dough. To keep the pumpkin shape, don’t score too deep.
- Bake the dough. Remove the dutch oven from the oven and remove the lid - remember the lid will be super hot! Carefully place the dough in the dutch oven. Cover with the lid and bake at 450°F for 20 minutes. Remove the lid and reduce the oven temperature to 425°F. Bake for another 45 minutes until the center of the loaf reaches 205°F
- Cool the dough. Carefully remove the dough from the dutch oven and let cool on a wire rack or cutting board for 1 hour before cutting for the best texture. Cut and remove the kitchen string. Add an inverted cashew or piece of cinnamon stick to the center of the dough for the stem of the pumpkin. Slice and serve!
Notes
- Tip: Just to be sure, I like to lightly pull the rested dough from the sides of the breadbasket before placing the strings to make sure it cleanly releases once flipped.
- Cups vs Grams: For best results, weigh ALL your ingredients. If you don't have a kitchen scale, use the spoon and level method of filling your measuring cups.
- Starter amount: The higher amount of starter means the dough will rise faster. Most sourdough loaf recipes call for 50g of starter for an 8 to 10 hours rise (usually for overnight counter bulk rise). If this timing works better for you, reduce the amount of starter. My preference is to let the dough rest in the fridge overnight for better oven spring and easier scoring.
- Water amount: This dough calculates out to about 63% hydration, but the pumpkin puree and the extra starter adds moisture. In addition, all-purpose flour absorbs less water than bread or whole wheat flour. For a more typical sourdough loaf, try decreasing the water by 30g.
- Plastic wrap or damp towel: I have found that plastic wrap or a shower cap works best for me.
- Preheating: My best results are from preheating the dutch oven and lid in the oven. Also, let the oven preheat longer than when it says it's ready. Usually about 20 minutes.
- See post about for sample baking schedules
Aylin says
I was worried about trying this, because there was only one review however, I took the plunge, and I was pleasantly surprised initially, the doughwas very loose and it was super bubbly at the end of fermentation. I did add the ingredients through lamination before moving it to Bone to rest in the fridge for proofing for 24 hours.
At the end of 24 hours, it was so jiggly like a Jell-O. I was sure that it would not hold its shape, let alone be a pumpkin however, once I inverted it, it started holding its shape and I was able to actually bake a nice pumpkin shape.
For a good measure, I did place it in the freezer for 10 minutes before I took it out of the basket
Everyone loved the taste. The crumb was nice. I did bake it at high degree for 40 minutes and then turn it down to 425.
Lauren says
Thanks for the feedback - glad you loved it!